
These cookies seems to be the most high maintenance goods that I ever made.
I was first introduced to these little sweet treats about a year ago when a new cafe opened in my neighbourhood and their macarons were the highlight. It was literally like love at first sight, but this love comes with an expensive cost. Each one of these little French cookie sandwiches cost around $2.50-$3 each. It took me a year before I finally found the motivation to try to make them myself.
Of course, with my tea addiction, I found the recipe to make the Earl Grey kind. I found the recipe for the macaron shells on another blogger site - design.bake.run, but I used a different filling in between. I found another blog (The Tart Tart) that made lavender macarons, but they made a honey butter cream filling that seemed perfect for this earl grey macaron.
I tried to take photos as I went through with the process of baking these, but sometimes I just forgot. I tried my best.
 Adapted from design.bake.run blog:
For the Earl Grey Tea Macarons, you'll need:
-1 cup of powdered/icing sugar
-3/4 cup of almond meal
-1 packet of earl grey tea leaves (I usually use Twinings for my baking and I used one and a half tea bags)
-2 large egg whites (save the egg yolks for the filling!)
 -5 tbsp of granulated sugar
Of course, line two cookie sheets with parchment paper and have a piping bag/ziplock bag ready for the batter.
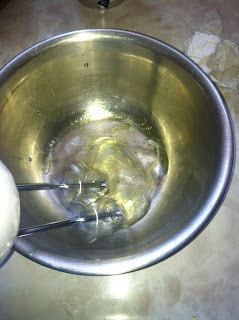
Separate the egg whites and yolks. Put the egg whites in a a large bowl. Set the yolks aside. Using an electric mixer, beat the egg whites till they are stiff.
It'll end up looking something like this. Once you have reached to this point, grab your granulated sugar.

Add 1 tbsp and mix until well incorporated. Repeat until you have put 5 tbsp of sugar into the batter. It should remain being stiff and rise up. Once this is complete, set this aside.

Sifting your ingredients at this stage is very important in macaron making!
In another bowl, stiff the almond meal to make sure there's not lumps and they are separated.

Sift the powdered sugar into your bowl. Along with this, sift in your earl grey leaves into the bowl as well. Mix the dry ingredients with a utensil until it's well mixed together.

Pour half of the dry ingredients into the egg whites bowl. Using a plastic scrapper, gently fold the wet and dry ingredients together. Pour the rest of the dry ingredients and repeat. Keep folding until the batter looks smooth with no bubbles or lumps.
Pour the batter into your piping bag or ziplock bag (with a hole cut at the corner).

Begin piping out the batter to make the same diameter sized circles. I know, it's hard, but more or less the same size would be good enough. After you are done piping, gently lifting the cookie sheet above your kitchen counter top and drop it. Repeat for a couple of times. This will release any remaining air bubbles within the cookie batter. Let the cookie sheets sit out for approximately 30 minutes.
At this point, I'll begin pre-heating the oven to 350 degrees F. Once the oven is ready, bake these cookies for approximately 10-15 minutes. Be sure to check on them after the 10 minute mark to make sure they don't burn, but you would want the tops of the cookie to be sightly golden.
Take them out of the oven and let them sit out to completely cool down. Once they are cooled down, then you can begin piping the filling onto them.
While you are waiting for your cookies to cool down, you can begin making the filling. Refer to The Tart Tart's blog for the filling instructions!
After you assemble the cookies together, you can serve them right away if you would like. What I found is refrigerating them for a few hours makes them even more enjoyable, especially for summer days. Also, it would make the cookie hold it's delicate shape together much better.
I hope you enjoy this recipe!
-Susan

For the Earl Grey Tea Macarons, you'll need:
-1 cup of powdered/icing sugar
-3/4 cup of almond meal
-1 packet of earl grey tea leaves (I usually use Twinings for my baking and I used one and a half tea bags)
-2 large egg whites (save the egg yolks for the filling!)
 -5 tbsp of granulated sugar
Of course, line two cookie sheets with parchment paper and have a piping bag/ziplock bag ready for the batter.
Separate the egg whites and yolks. Put the egg whites in a a large bowl. Set the yolks aside. Using an electric mixer, beat the egg whites till they are stiff.
It'll end up looking something like this. Once you have reached to this point, grab your granulated sugar.

Add 1 tbsp and mix until well incorporated. Repeat until you have put 5 tbsp of sugar into the batter. It should remain being stiff and rise up. Once this is complete, set this aside.

Sifting your ingredients at this stage is very important in macaron making!
In another bowl, stiff the almond meal to make sure there's not lumps and they are separated.

Sift the powdered sugar into your bowl. Along with this, sift in your earl grey leaves into the bowl as well. Mix the dry ingredients with a utensil until it's well mixed together.

Pour half of the dry ingredients into the egg whites bowl. Using a plastic scrapper, gently fold the wet and dry ingredients together. Pour the rest of the dry ingredients and repeat. Keep folding until the batter looks smooth with no bubbles or lumps.
Pour the batter into your piping bag or ziplock bag (with a hole cut at the corner).

Begin piping out the batter to make the same diameter sized circles. I know, it's hard, but more or less the same size would be good enough. After you are done piping, gently lifting the cookie sheet above your kitchen counter top and drop it. Repeat for a couple of times. This will release any remaining air bubbles within the cookie batter. Let the cookie sheets sit out for approximately 30 minutes.
At this point, I'll begin pre-heating the oven to 350 degrees F. Once the oven is ready, bake these cookies for approximately 10-15 minutes. Be sure to check on them after the 10 minute mark to make sure they don't burn, but you would want the tops of the cookie to be sightly golden.
Take them out of the oven and let them sit out to completely cool down. Once they are cooled down, then you can begin piping the filling onto them.
While you are waiting for your cookies to cool down, you can begin making the filling. Refer to The Tart Tart's blog for the filling instructions!
After you assemble the cookies together, you can serve them right away if you would like. What I found is refrigerating them for a few hours makes them even more enjoyable, especially for summer days. Also, it would make the cookie hold it's delicate shape together much better.
I hope you enjoy this recipe!
-Susan
No comments:
Post a Comment